
A simple guide to getting started with Magic Map
In this quick start guide we will cover the core concepts for successfully using Magic Map.
Covered in this article:
- Syncing with training.gov.au
- How to add a unit to your library
- How to download your unit map as various file types
- Other main features
Once you’re familiar with Magic Map, you’ll say goodbye to copy-and-paste!. So, let’s get started!
How to add your first unit
Click “Add New” from the sidebar to search a unit from training.gov.au and add it to your Library.
What is ‘the library’? It’s where you’ll store all the units you need from training.gov.au.
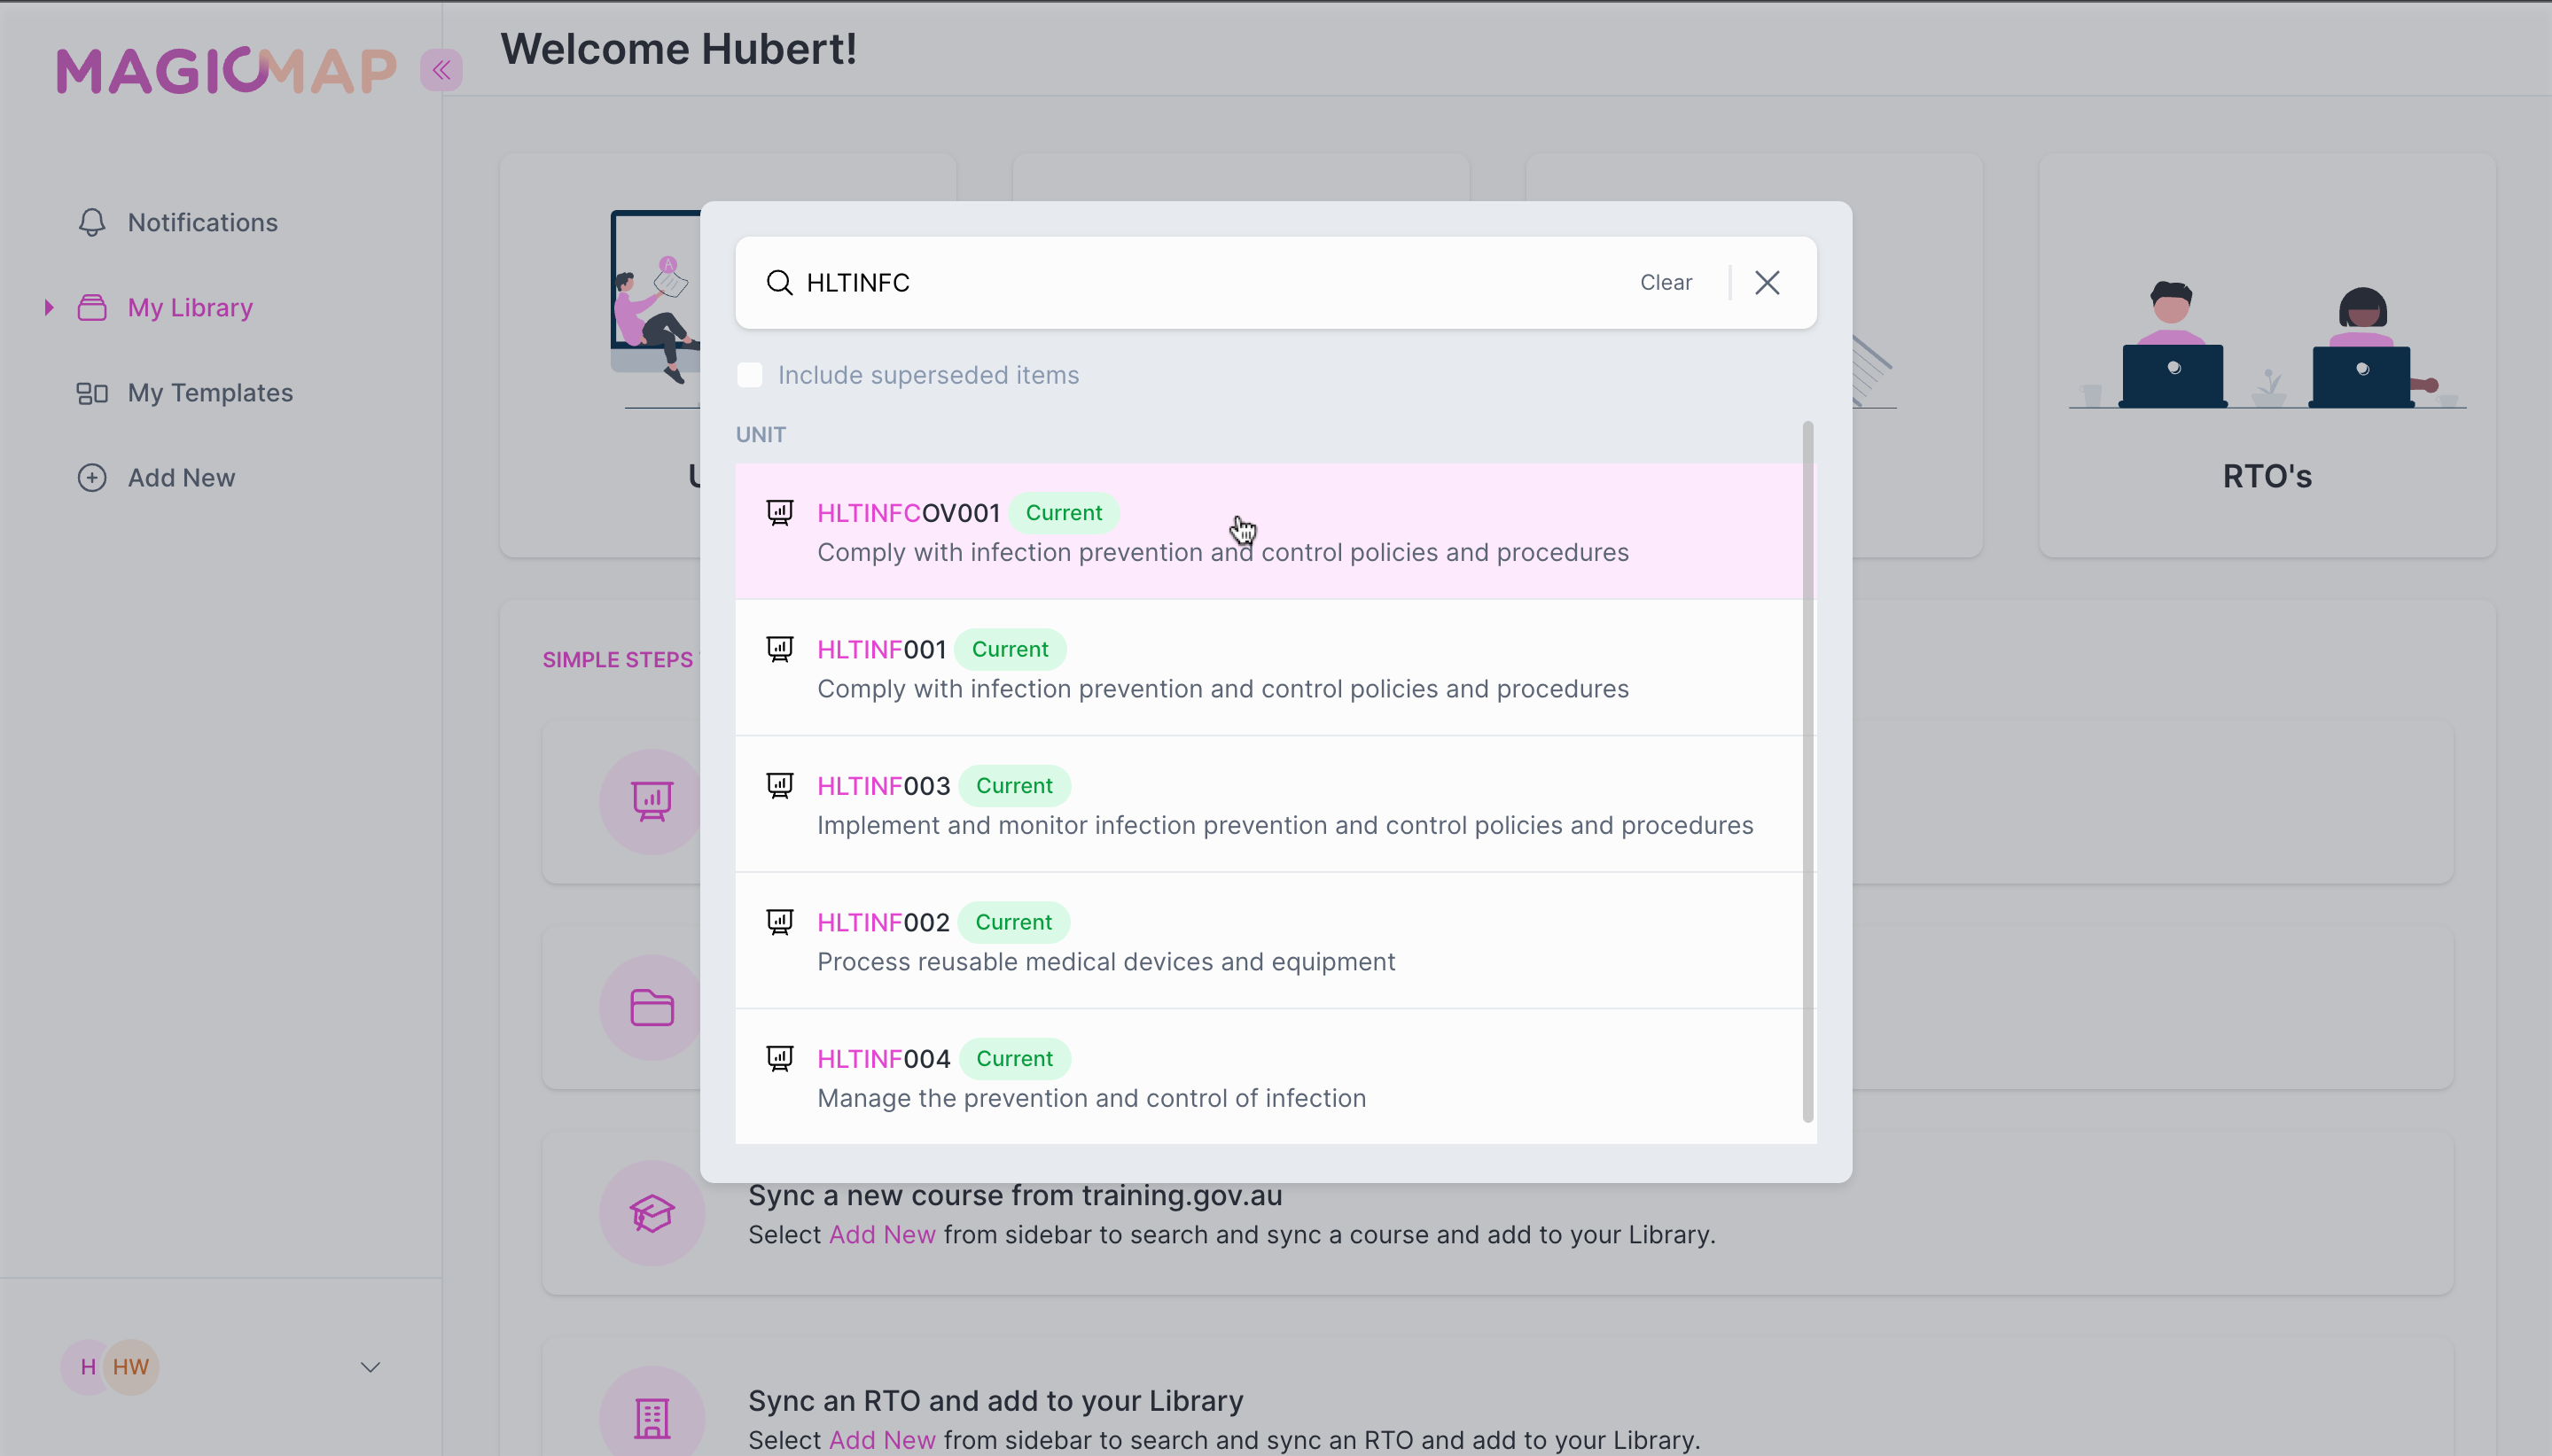
Type the intended unit code. (For example below: HLTINFCOV001.) Then, click on the unit to sync the unit data from training.gov.au.
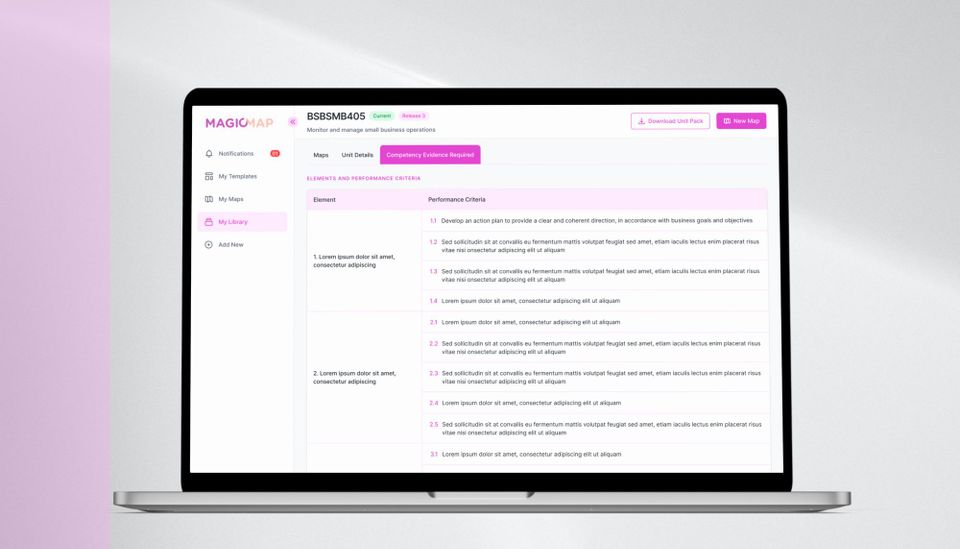
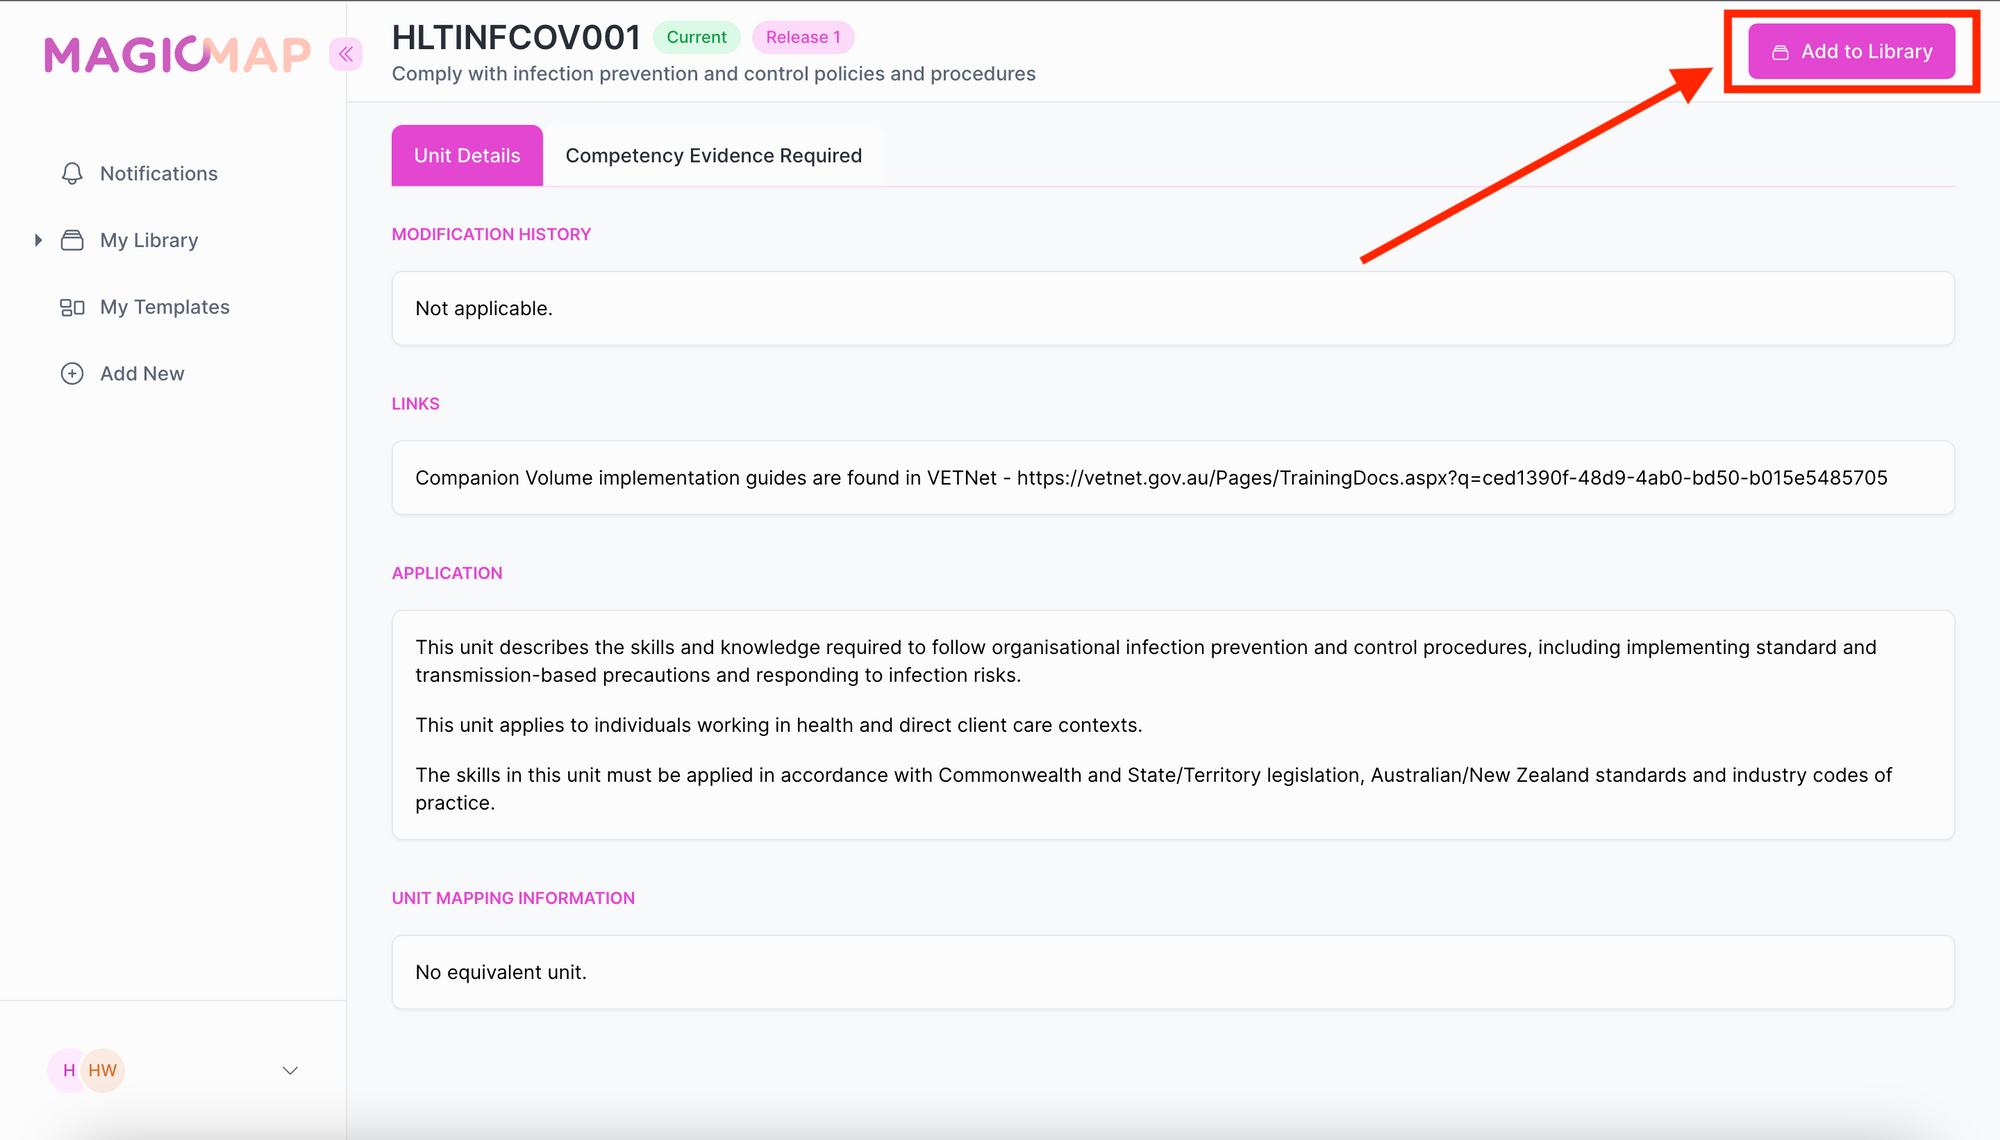
Now at the unit details screen, you can add it to your library by clicking on the “Add to library" button.
Create, save and assign your first map
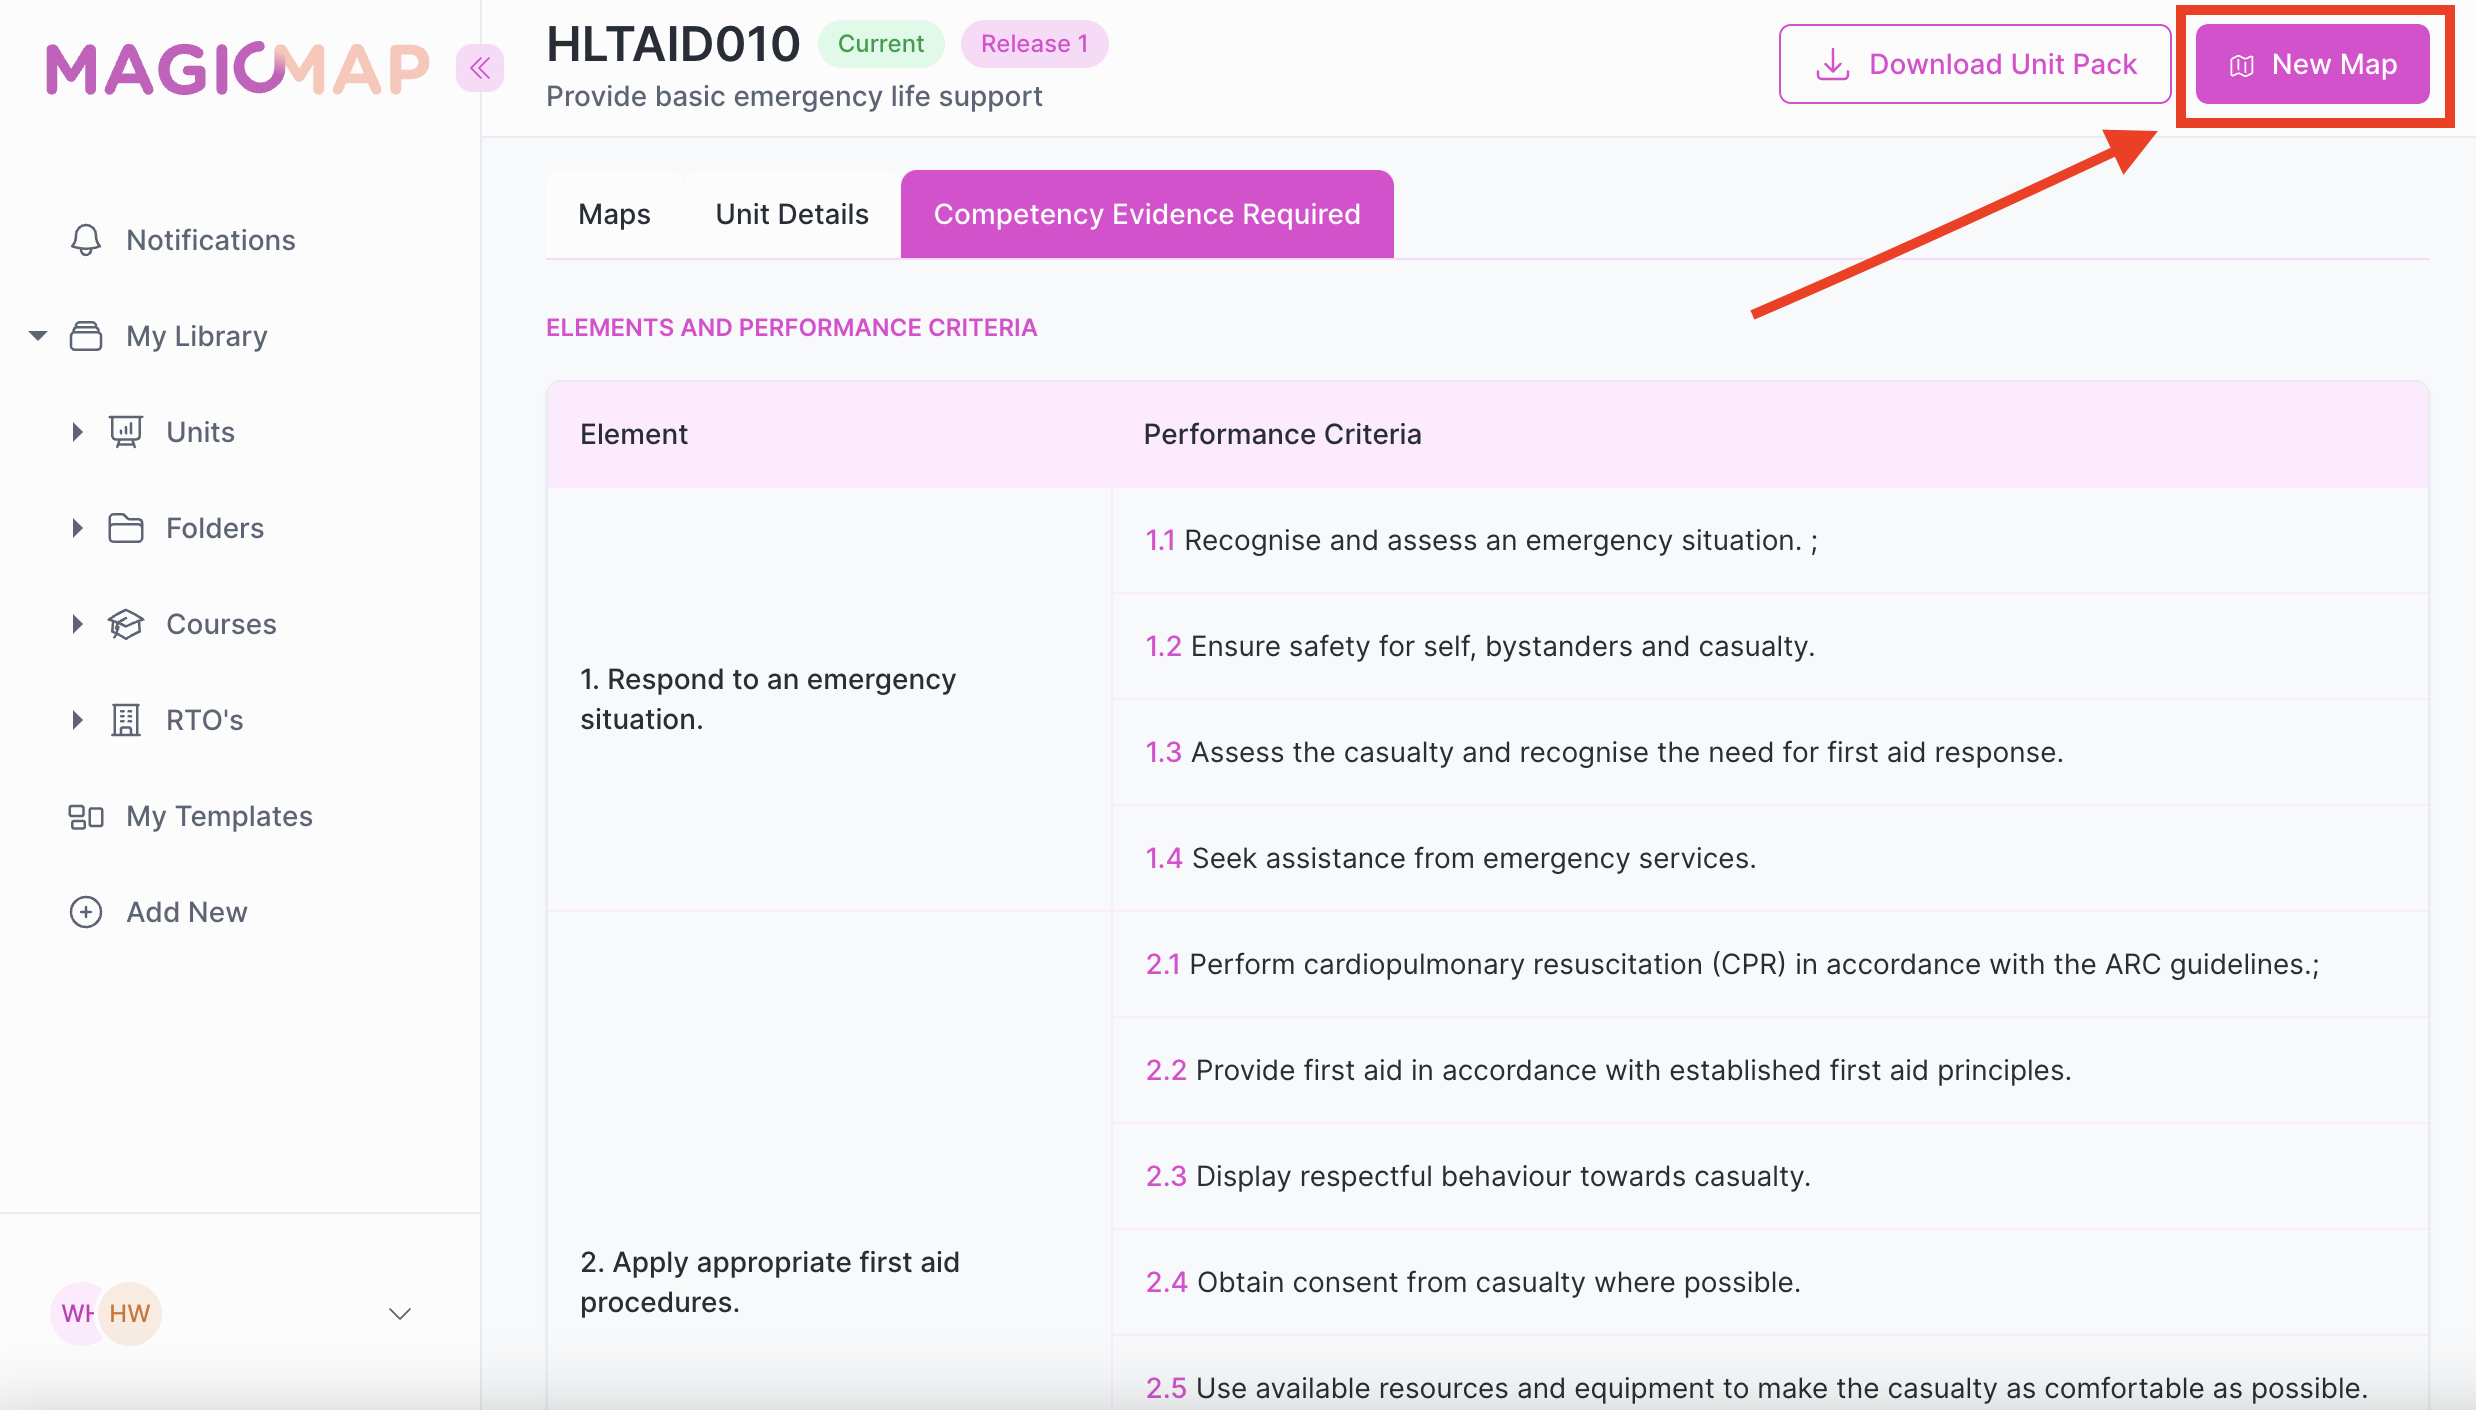
Once you have synced at least one unit, you will be able to create a map.
Click ‘New Map’ at the top right of the unit detail page to start.
1. Select the ‘New Map’ button to begin
2. Assign your map to a particular RTO, course, and/or folder
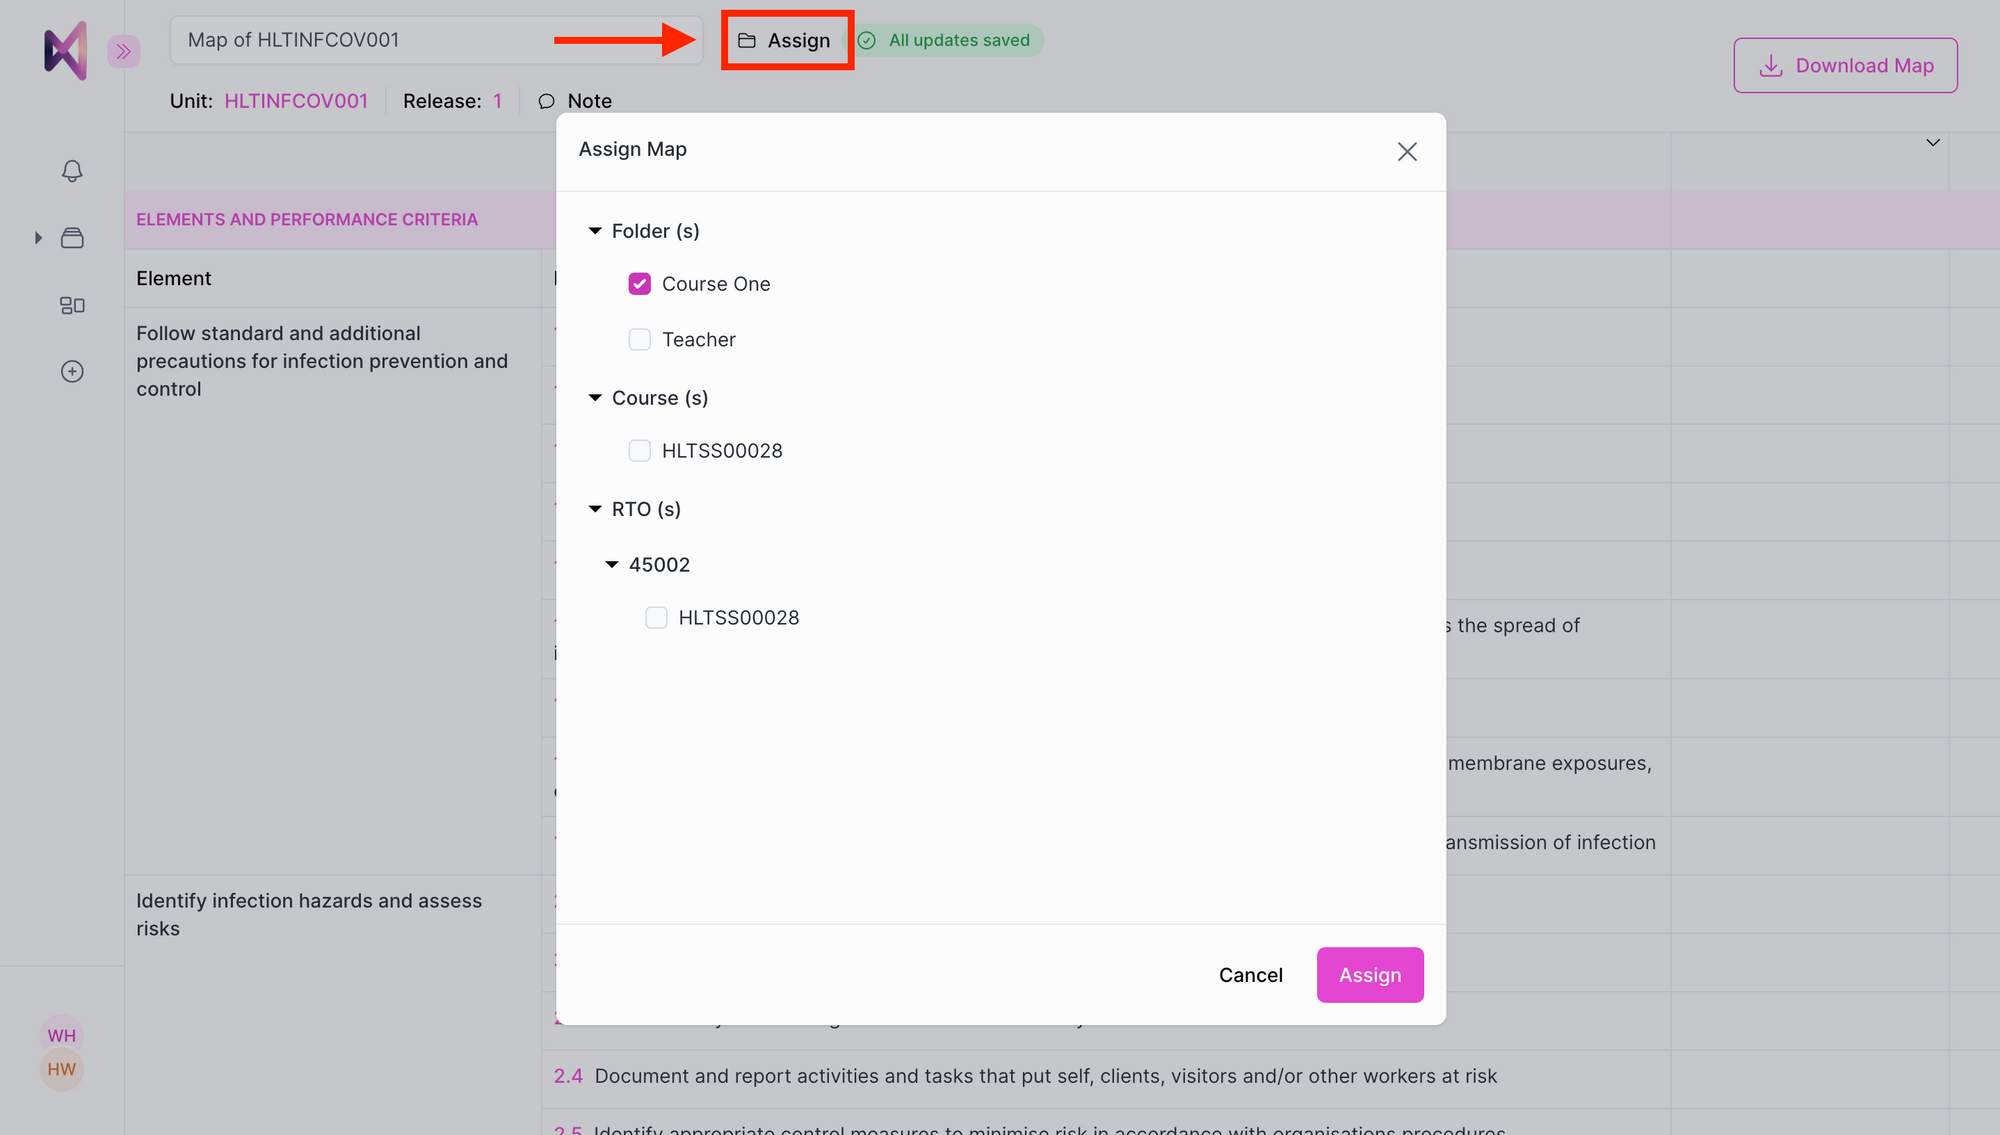
Assign the map to places:
- Course/RTOs: you may only assign a map to a Course/ RTO that is synced to your account and contains the unit attached to the map.
- Custom folders: any custom folders you have created will appear in the dropdown menu of the ‘Assign to folders’ drop down.
Click the Assign button to finish.
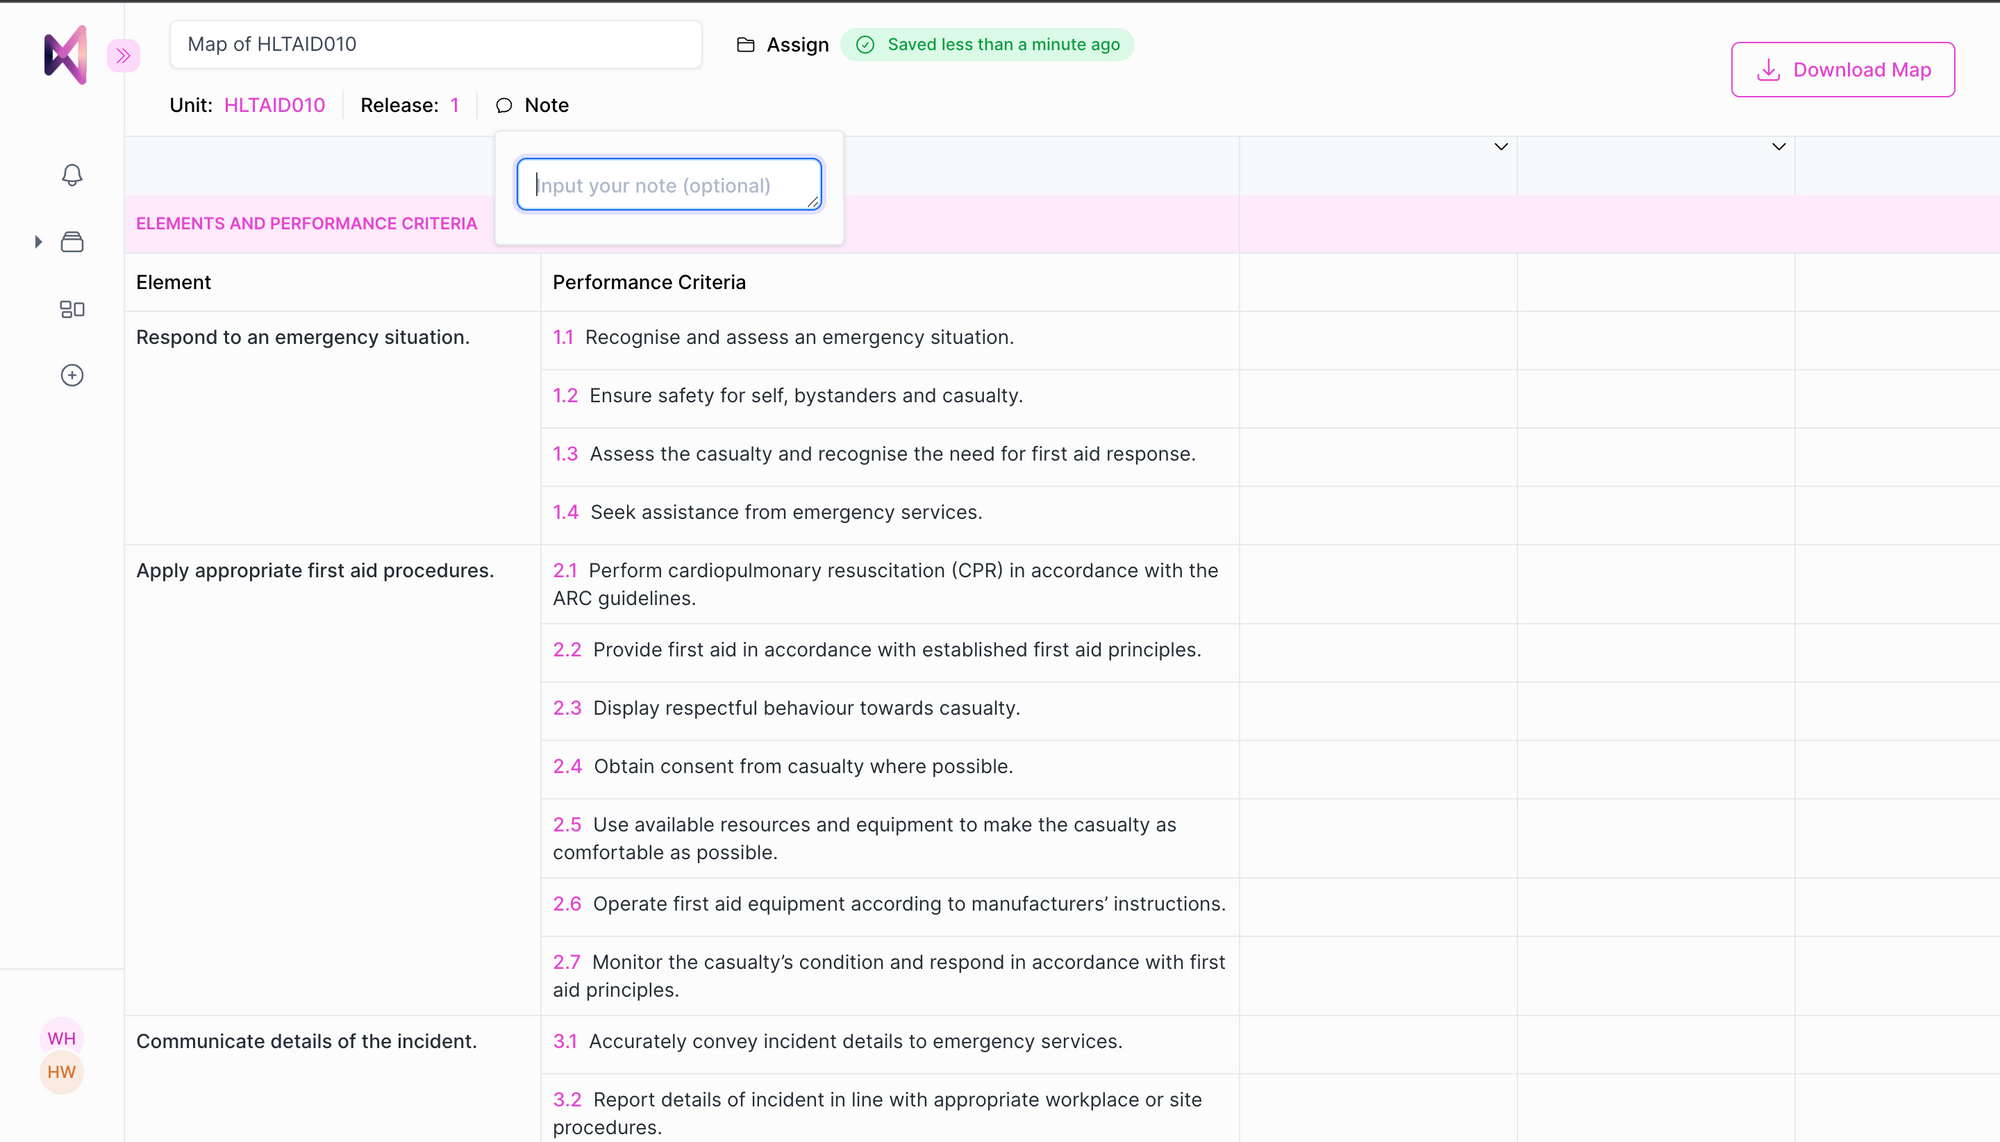
3. Add notes
Need to assign a special note or description to your map? Add it with the ‘note’ feature. The note you input while saving/assigning a map will be displayed at the control bar in a mapping template:
Download your maps
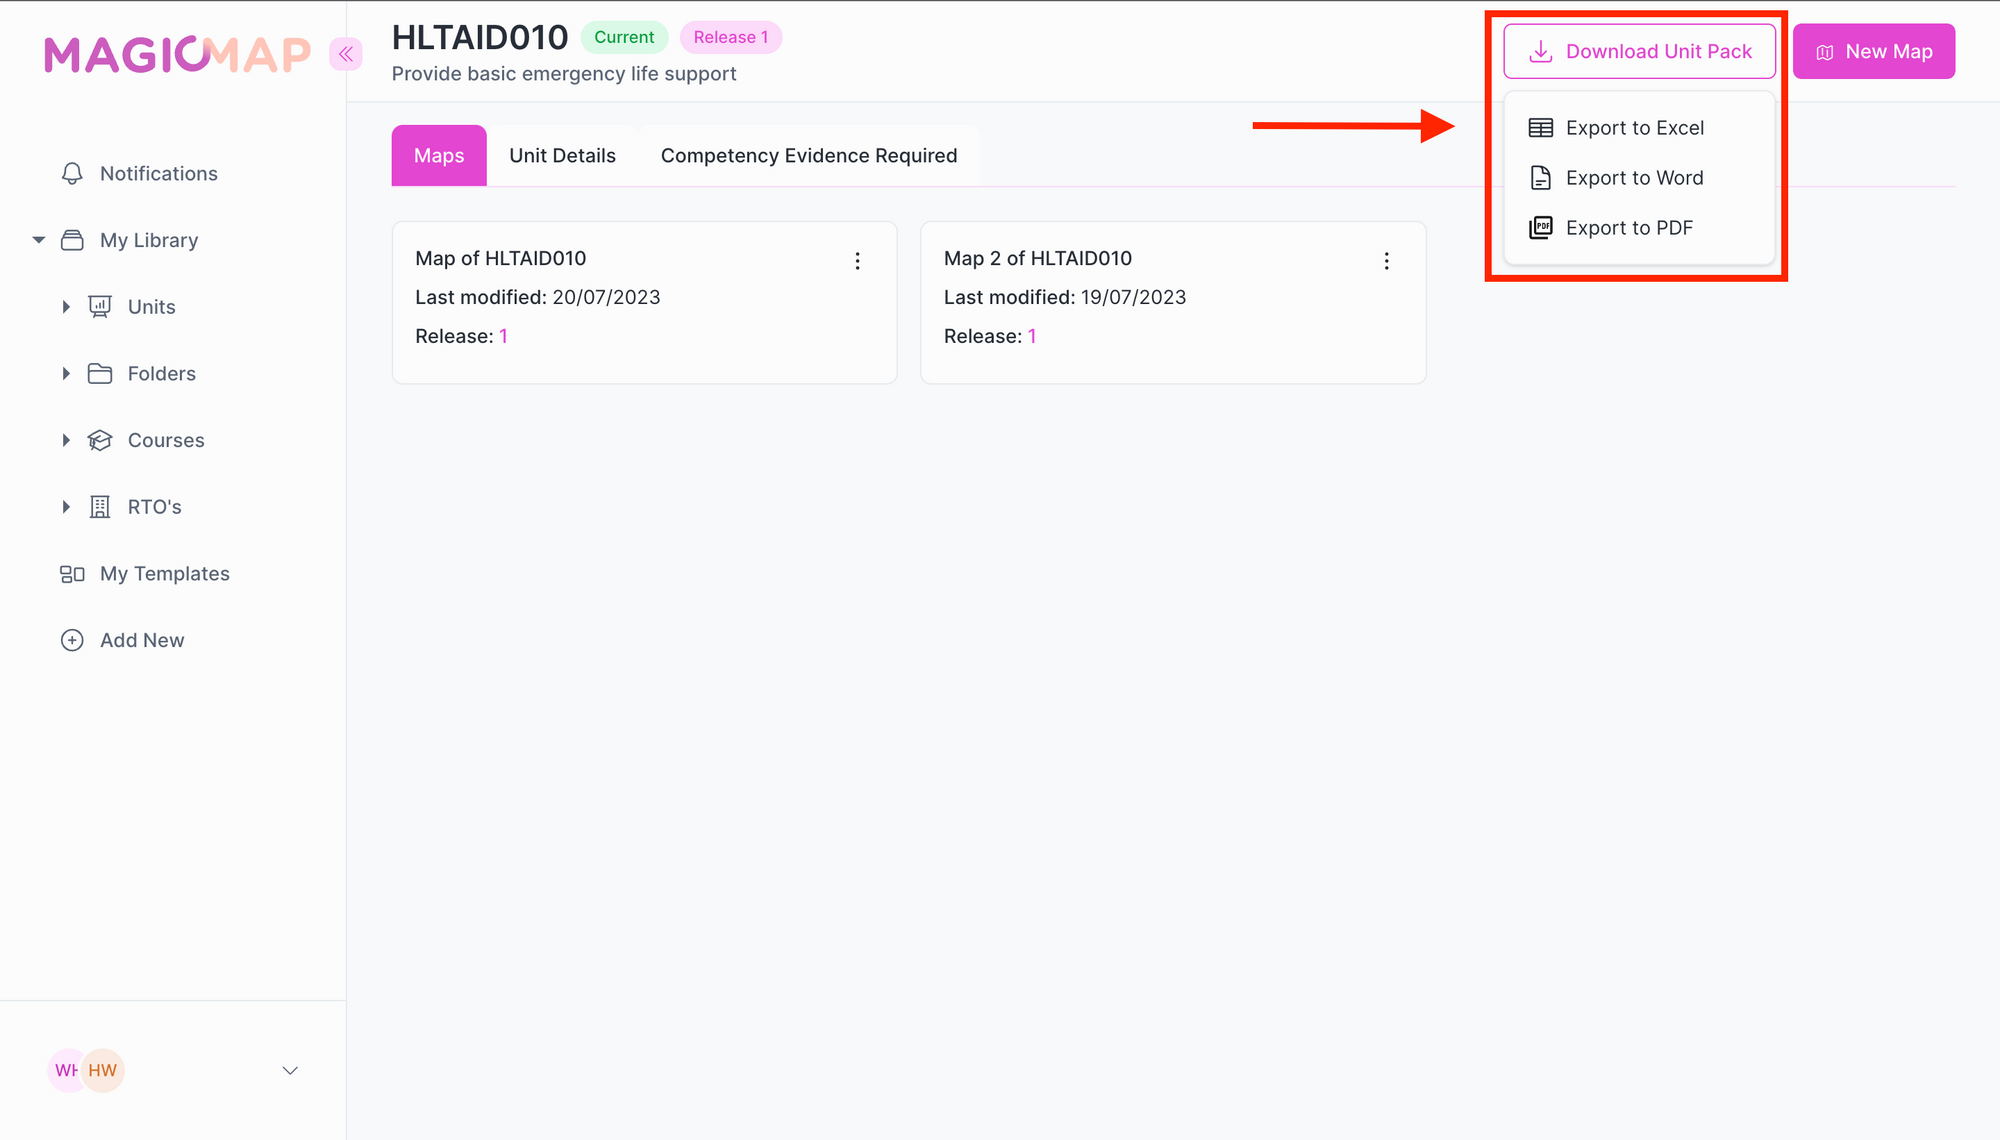
After completing your unit map within Magic Map, you may then download it in any or all of the following formats:

Experience the full power of Magic Map in your way.
- For Power Users & Teams: Claim your 7-day free trial and unlock premium collaboration and advanced mapping tools.
- For Casual Explorers: Just looking for the basics? Get started with our Free Forever plan, it's perfect for light use, no strings attached.